Getting started
Choose a domain and template
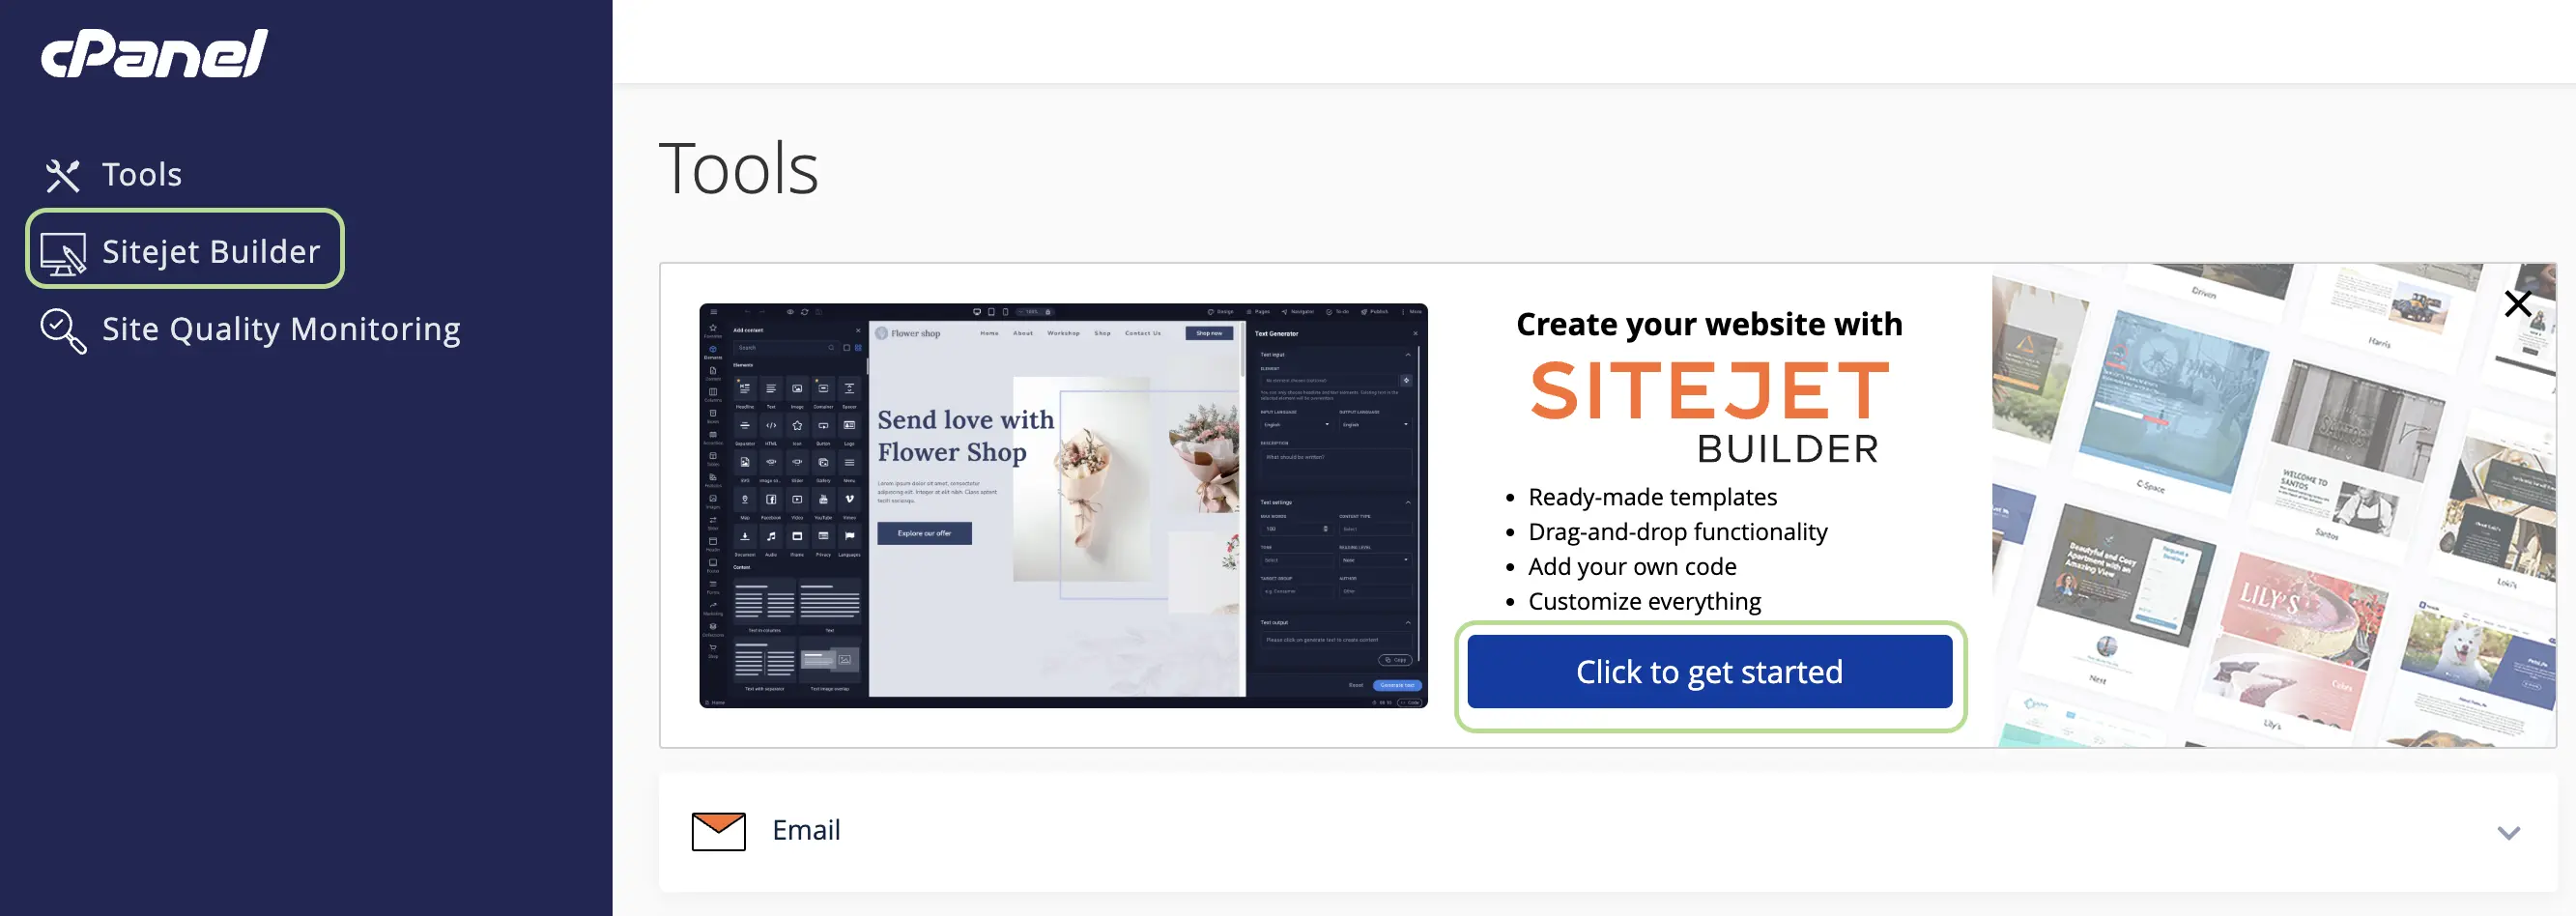
Navigate to Sitejet Builder
You can click on the link on the left side or the button on top (marked with a green box in the screenshot).
Create a new (sub)domain in cPanel (Optional)
If you have more (sub-)domains available in your account, you can create a new one from the button. Only necessary if
you can’t find the domain you want to use in the list below.
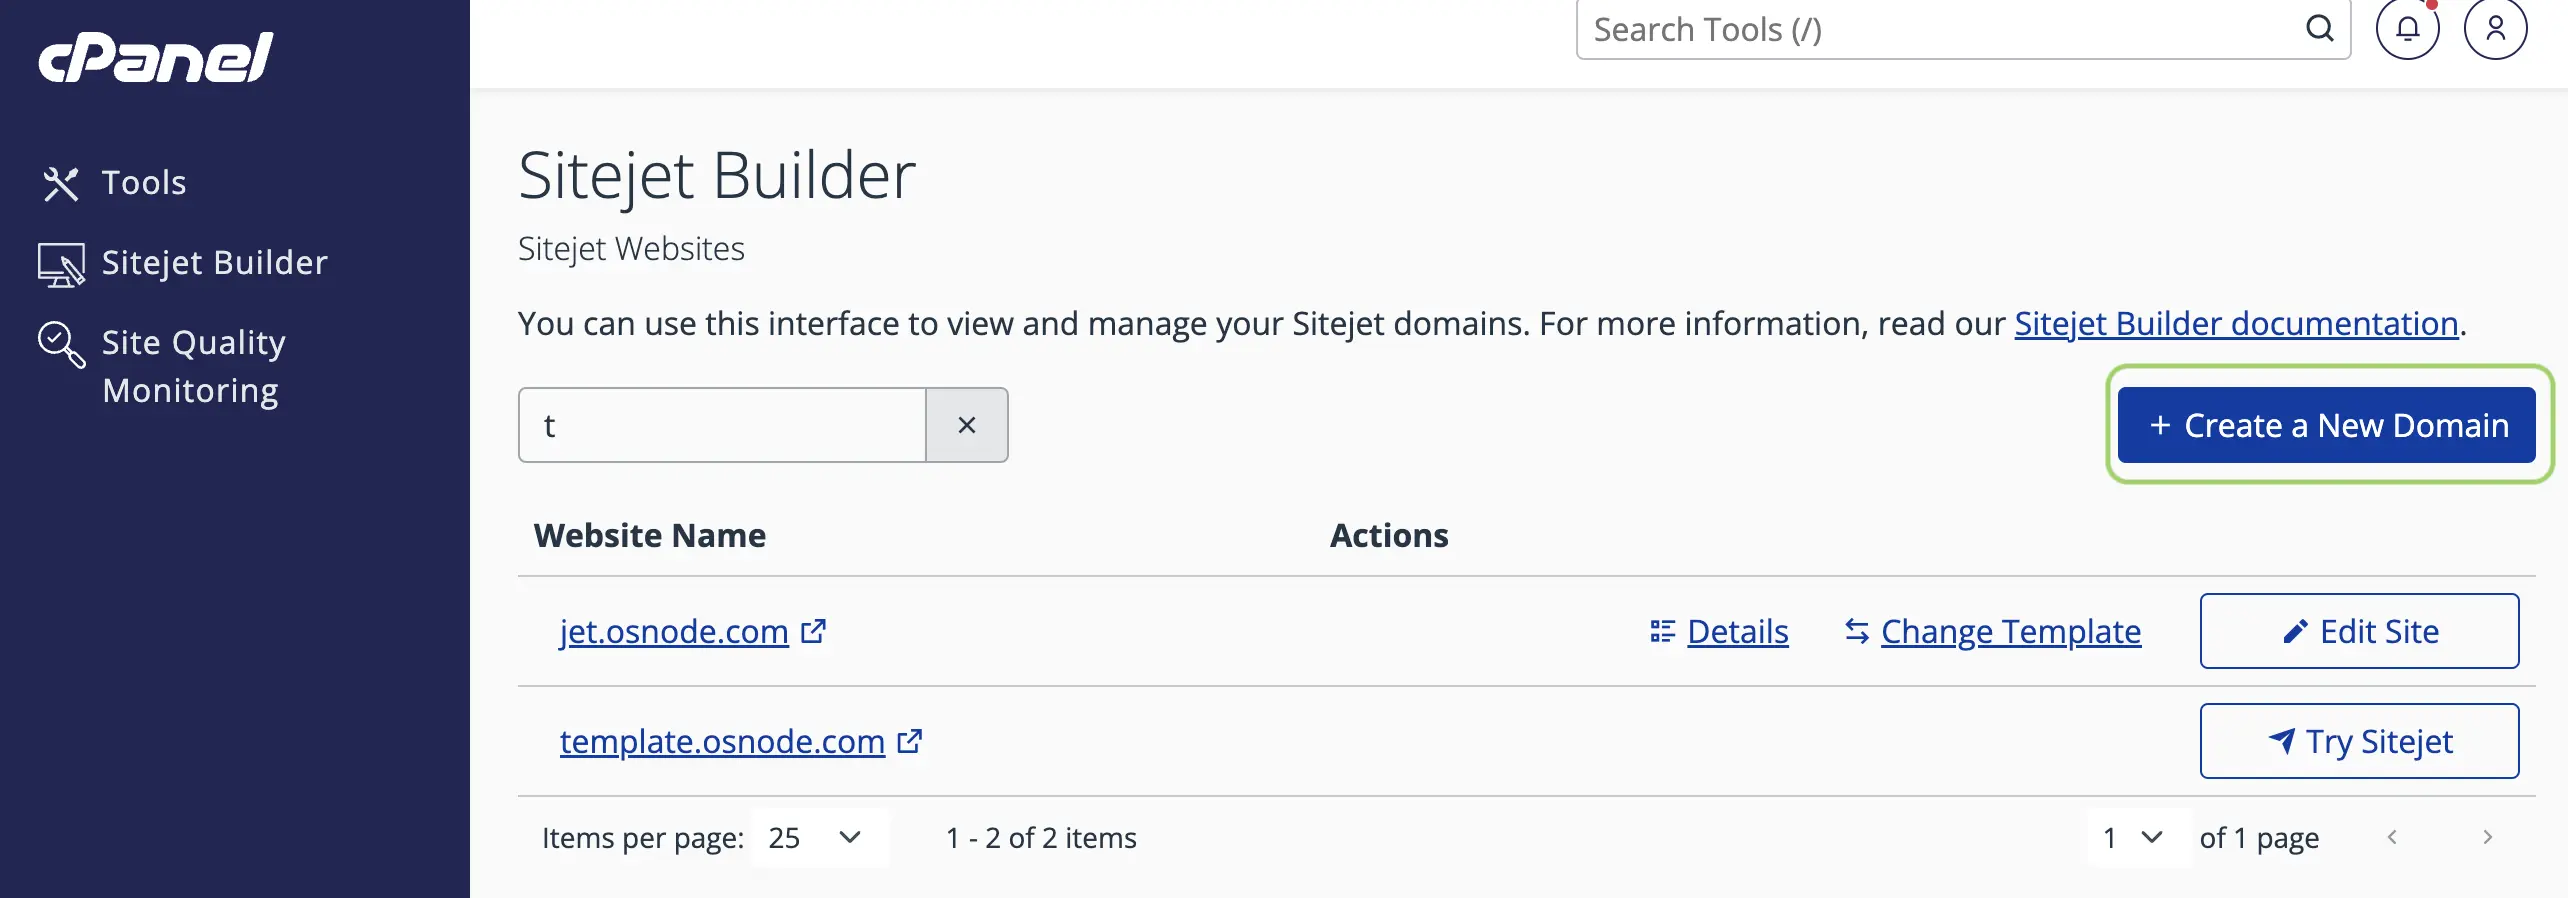
Click the “Try Sitejet” button
Now you can click on the “Try Sitejet” button on the line of the domain you want to use.

Choose a template
Now you will be taken to a page where you need to choose.
There is also a template named “Blank” if you want to start from scratch.
Start editing
Now you are ready to update the template with your texts and pictures, adding new pages, etc…
First steps in the editor
These are our recommendation and, by no mean, mandatory steps to take at the beginning. However, we find that doing this at the start will help avoid possible issues later.
An example of these “errors” is to change the global settings in the font (type or size) after working on text to make them match the size of the container. If you go through an issue like this, you can always undo the change!
Add your logo and set the color scheme for you site.
When adding your logo, either in the settings or on the page your are editing, remember to change it globally! Then you will get a popup to propose some color scheme, we recommend setting background, primary and secondary (font is usually less important at this stage).
Check the “Design” settings
Design menu is on the top of the builder screen, look at all those settings and update what you need. It is better to update all possible customizations like button color, hover effects, fonts, headlines, etc… at the beginning to avoid unexpected changes later on.
Set the data for your site
This is under the “More” link on the top menu. Update at least the company name, address and email. Those are use in templates to show correct information in, for example, the map. It can also be used in your own texts to update all when the data updates. if you move offices for instance.
Here is a nice video that shows how to get started.
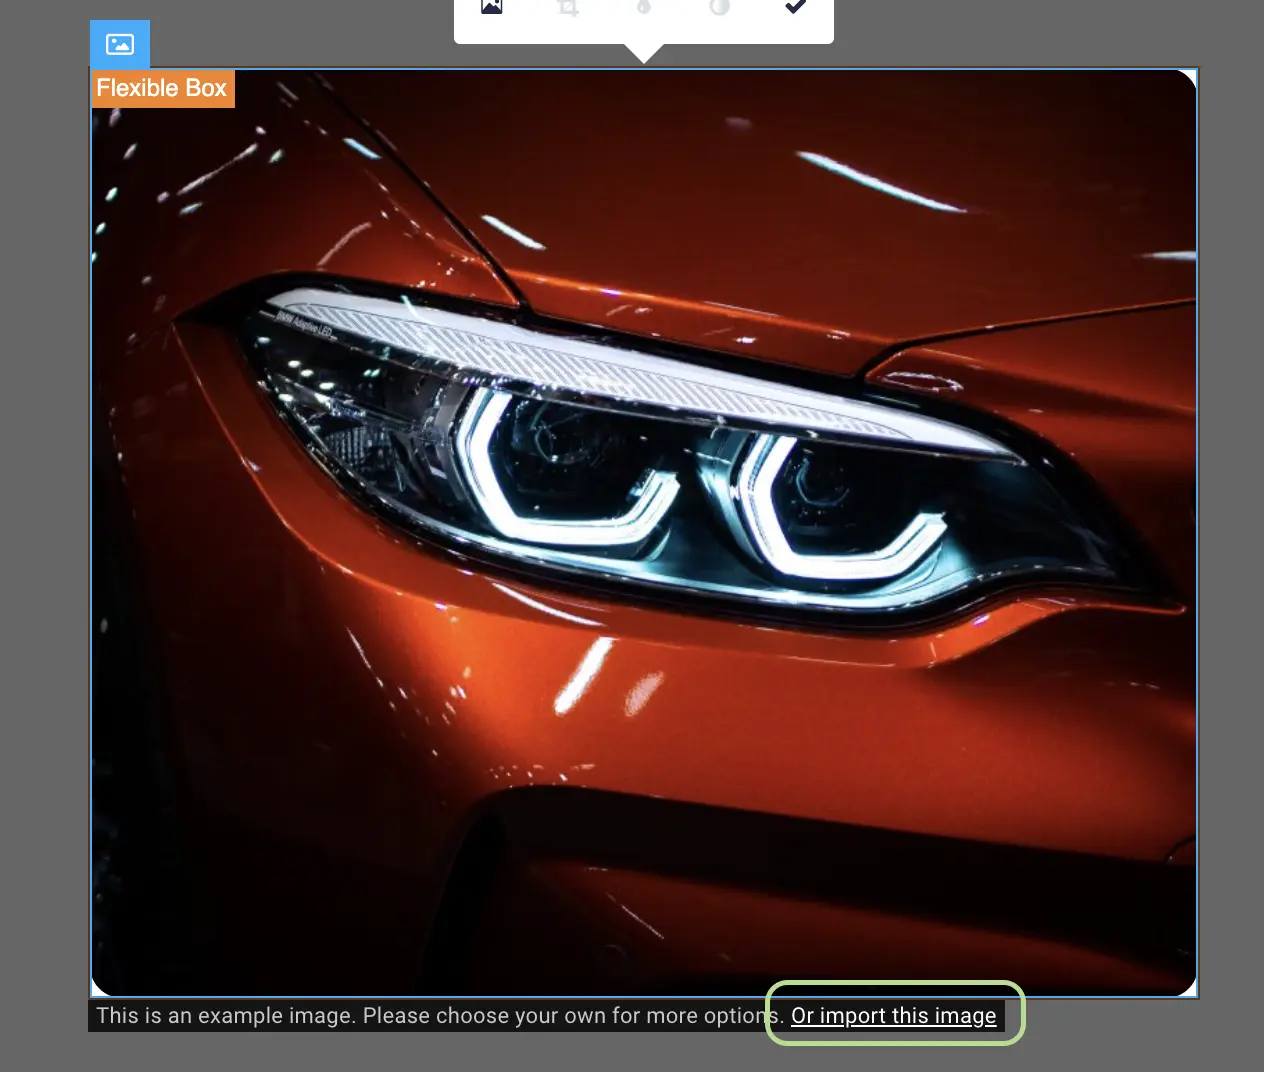
Next steps
Now you are ready to edit your page(s) with updated text and picture(s). However, if you wish to use the picture from the template, we recommend downloading them into the project. The site will work without but imgae optimization will be limited until you have done it. Import is very easy. Just select the picture and click on the link below as shown in the screenshot